Wednesday 16 May 2012

Bottling Cherries


Bottling Cherries is so simple and when you have a glut it's the time to take advantage of this fruit.  Cherries are a rich source of antioxidants.  Queritrin, a flavanoid is rich in cherries and said to be anti cancerous.  Rich also in Melatonin, an antioxidant that has been found to help the bodies natural sleep pattern.  So why not try a glass of natural cherry juice before going to bed.  I also keep the cherry stalks and dry them in the sun to make a tisane, something my husband told me about.  Said to be good for helping the kidneys eliminate water from the body.  Incidentally they are sold in supermarkets in France.

Bottling cherries whole

Fill sterilise jars with cherries,  I don't stone them, as I think it damages the fruit too much.  I stone them later on when I use them, the stones also come out easier after they have been conserved. Push them down in the jars a little.  Next make a light syrup with 1 litre of water and a 150g of sugar dissolved in it. Fill jars with cool syrup, leaving a 1 cm gap at the top.  Don't screw lids on too tight, as the air has to escape.  Of course, this depends on what type of jar you use.  Put into tall saucepan and fill with water, covering jars by 4 cm.  Put on the heat and bring slowly up to 80°c, taking about 45 minutes.  Then maintain this for 10 minutes.  Don't let jars cool in the water.  Lift them out, being careful not to touch the lids.  As they cool, the lids will become concave, if they don't repeat the process.

Cherry syrup

I put about 9 kg of slightly tart, unstoned cherries in a saucepan, I then added about 30g - 40g of sugar for each kg of cherries.  Bring up to the boil and simmer for 15 minutes.  Tip into colander and squash the cherries with a masher or put into chinois.  Pour into sterilised bottles, store in fridge and use within 2 weeks.  Dilute with still or fizzy water or why not make a cherry cola.

Tuesday 1 May 2012

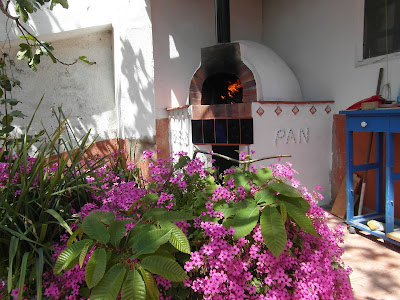
My Wood Fired Oven

I've wanted to build my own oven for many years now but never had the time, or the space before.  First I wanted to choose a spot that was close to the house.  I have a beautiful terrace which is at the front of the house and I didn't want anything blocking the view from the terrace, so in the end I found a corner, big enough to build it. 

I got information on how to build one from from the Internet , a french book I have, and I kind of amalgamated it all and just started.  My husband helped me put in the steel work and the wood to do the base but apart from that it is all my own work.


I opted for a diameter of 70cm, I then cut the circle in half to make a template for cutting the polystyrene for the dome.


The first layer of concrete for the base was 10cm deep, I then put another layer of cement and perlite for insulation of about 7cm.  Onto this I put re factory mortar and laid the refractory bricks onto this so they would give the oven floor a 10cm thickness.  The refractory bricks for the dome I cut in half, I used a cheap, electric tile cutter for this. The top of the dome was the hardest to do and I wish now I had cut the bricks a bit better, although they all locked in and stayed in place without mortar, I think in the long run I should of taken more time to cut them better.  I gave it a good covering with refractory cement.


The mouth was difficult to do, in the end I put to fire bricks on end and then put two 4cm corner pieces of iron and fitted half bricks onto it.


The mouth I made just a few centimeters bigger, so as to give the door something to sit against.


I left an opening in the mouth for the chimney.


I fitted a piece of iron in the opening for the chimney pipe to sit on.


Before advancing any further I let the cement dry for a couple of weeks and then built fires in it for a couple of weeks until I brought the temperature up to 300c.

I always think bread ovens are a bit biblical and magical.


Then I covered the dome in Rockwell insulation, fixing it all with chicken wire , which I anchored with screws into the base.  I covered this with concrete with a couple of trowels of lime mixed in to help it stick.  I made quite a dryish mix and pushed it into the mesh.  My husband said it wouldn't stick but it did.  When it had dried I covered it in cement.


I had a iron door made locally and bought a thermometer from http://www.vitcas.com/


I cooked a practice loaf in it today but I haven't got a implements for getting bread in and out of the oven and I balanced a loaf on a piece of wood and tried to slide it in the oven but I failed and it fell on a burning log.  It was a bit black and covered in ash and it tasted sublime.

I haven't added up the cost of it yet but I think it is near 500 euros.  I think it is worth it.