
I got information on how to build one from from the Internet , a french book I have, and I kind of amalgamated it all and just started. My husband helped me put in the steel work and the wood to do the base but apart from that it is all my own work.
I opted for a diameter of 70cm, I then cut the circle in half to make a template for cutting the polystyrene for the dome.


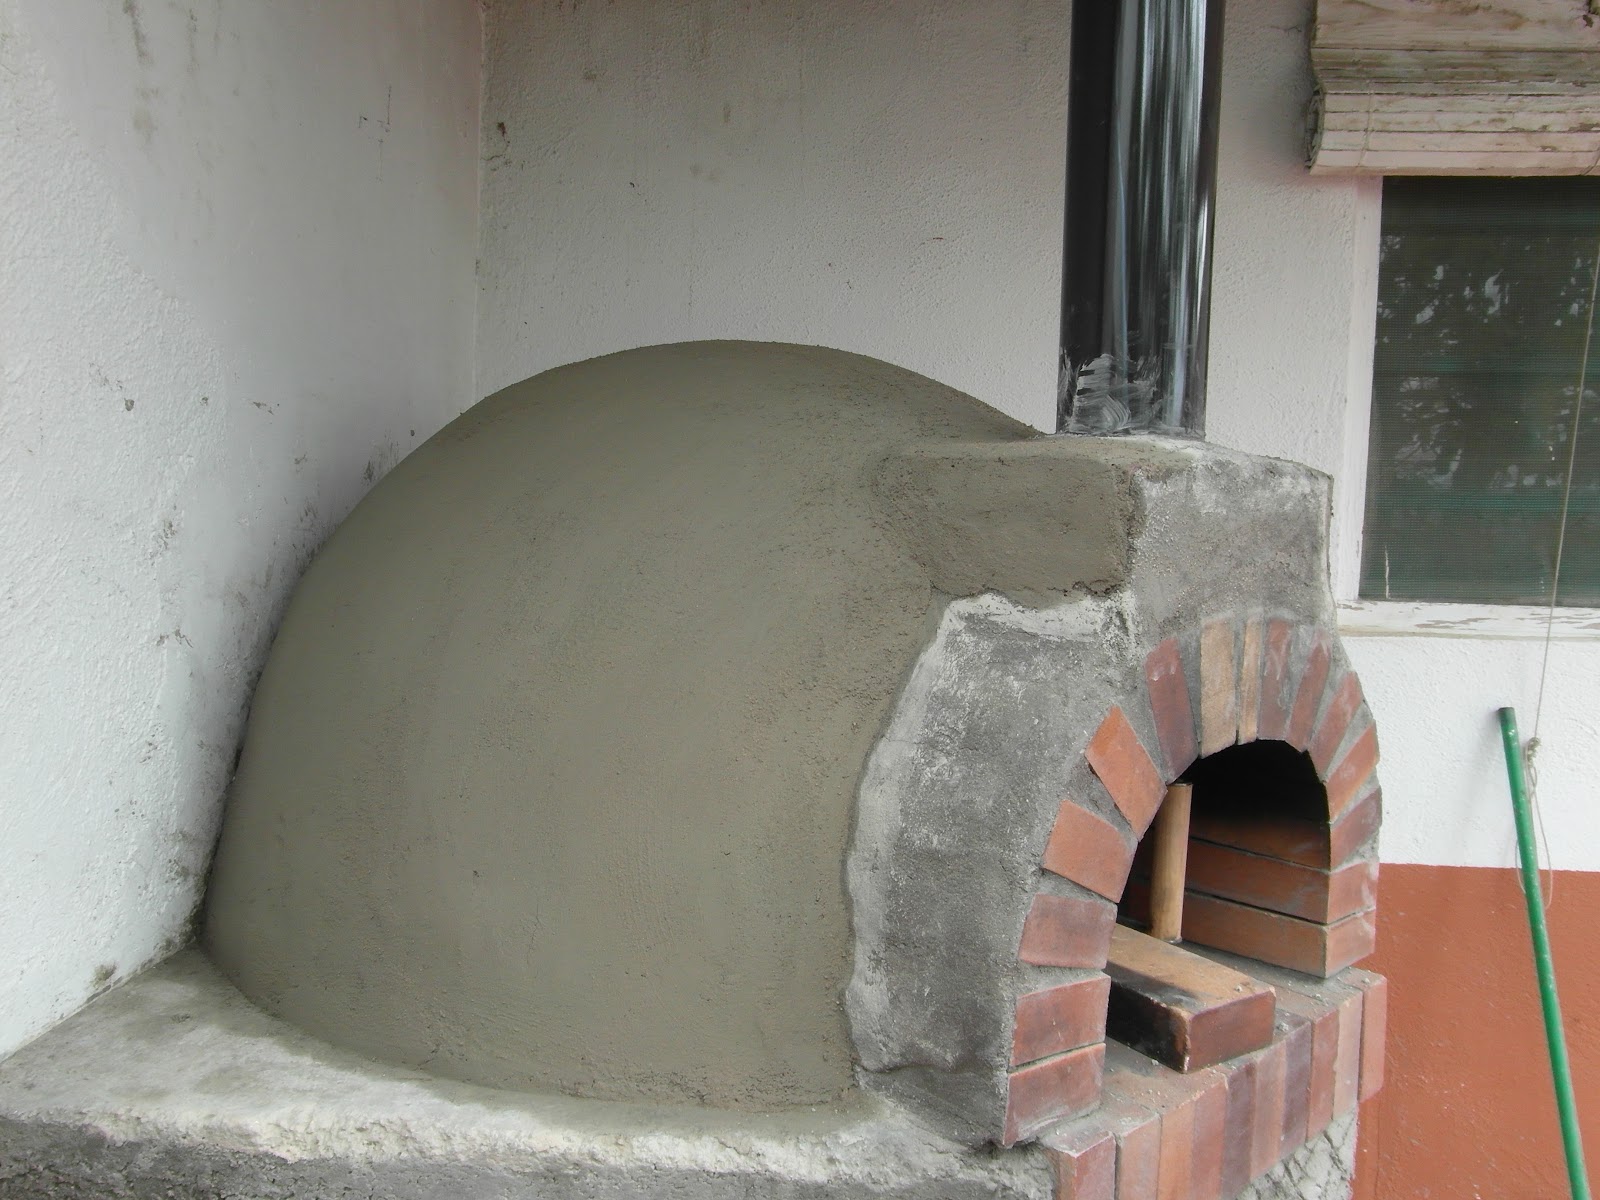
The first layer of concrete for the base was 10cm deep, I then put another layer of cement and perlite for insulation of about 7cm. Onto this I put re factory mortar and laid the refractory bricks onto this so they would give the oven floor a 10cm thickness. The refractory bricks for the dome I cut in half, I used a cheap, electric tile cutter for this. The top of the dome was the hardest to do and I wish now I had cut the bricks a bit better, although they all locked in and stayed in place without mortar, I think in the long run I should of taken more time to cut them better. I gave it a good covering with refractory cement.

The mouth was difficult to do, in the end I put to fire bricks on end and then put two 4cm corner pieces of iron and fitted half bricks onto it.


The mouth I made just a few centimeters bigger, so as to give the door something to sit against.

I left an opening in the mouth for the chimney.

I fitted a piece of iron in the opening for the chimney pipe to sit on.

Before advancing any further I let the cement dry for a couple of weeks and then built fires in it for a couple of weeks until I brought the temperature up to 300c.

I always think bread ovens are a bit biblical and magical.


Then I covered the dome in Rockwell insulation, fixing it all with chicken wire , which I anchored with screws into the base. I covered this with concrete with a couple of trowels of lime mixed in to help it stick. I made quite a dryish mix and pushed it into the mesh. My husband said it wouldn't stick but it did. When it had dried I covered it in cement.
I had a iron door made locally and bought a thermometer from http://www.vitcas.com/

I cooked a practice loaf in it today but I haven't got a implements for getting bread in and out of the oven and I balanced a loaf on a piece of wood and tried to slide it in the oven but I failed and it fell on a burning log. It was a bit black and covered in ash and it tasted sublime.
I haven't added up the cost of it yet but I think it is near 500 euros. I think it is worth it.
Love it. You did well there for a girly.
ReplyDeleteduh??????????????????????????????????
Deleteam gonna transfer this to my garden have wanted one for ages thank you xxx
ReplyDeleteI found your pizza oven here, and I wonder if you know how many bricks you used to build it ? Nice oven and good work ;-) Thanks :-) I am planning to build one aswell this summer :-)
ReplyDeleteKristin
Hello Kristin, looking through my bills for material, I used 155 bricks 11x22x5cm, I had one brick left over and a box of bits. That is for an oven of 70cm diameter, the base used loads. I hope this helps.
DeleteThank you :-) I estimated between 150 and 200 bricks. Do you think 70 cm in diameter is enough ? I have heard it should be 80 cm, but I have drawed one on 75 cm. I live in Norway, so I will have it under a roof in a garden house. Then it can heat up the area in the cold evenings.
DeleteKristin
Hi Kristin,
DeleteNo I don't think 70cm is enough. If I built another one I would make it bigger and I would also but in a ash drop. I think about 85cm to 110cm would be better but you will use more wood. I used a webpage called www.fornobravo.com it gave very useful information.
Good luck
Caroline
Thank You :-) I will post you again when I am finished :-)
DeleteI have also checked that webpage for information.
Kristin